English
OAuth sign-in (Google & GitHub)
By default, readers sign in via a magic link sent to their email. OAuth lets them sign in with Google or GitHub in one click — no waiting for email, no switching apps.
The trade-off: OAuth requires a one-time setup where you register an application with Google or GitHub and enter the keys in the trip2g admin panel.
How it works
OAuth does not grant access by itself. Access depends entirely on whether the provider email matches a user you have already registered in trip2g.
Two steps happen in sequence:
- You add the user in trip2g — enter their email address and assign a role (reader or admin).
- The user signs in via OAuth — their email at Google or GitHub must match the email you registered.
If the email matches, they get in. If it does not match any registered user, access is denied.
sequenceDiagram
    participant Admin
    participant trip2g as Trip2G
    participant Reader
    participant Provider as Google / GitHub

    Admin->>trip2g: Add user (email + role)
    Reader->>Provider: Sign in (one click)
    Provider-->>trip2g: Verified email
    alt Email matches a registered user
        trip2g->>Reader: Access granted
    else No matching email
        trip2g->>Reader: Access denied
    end
Set up Google OAuth
Step 1. Create a project
- Open Google Cloud Console.
- Create a new project or select an existing one.
Step 2. Configure the OAuth consent screen
- Go to APIs & Services → OAuth consent screen.
- Click Get started.
- Enter an app name (for example, the name of your site).
- Enter a support email address.
- Under Audience, choose External (any Google user) or Internal (your Google Workspace organisation only).
- Complete the remaining fields and save.
Step 3. Create credentials
- Go to APIs & Services → Credentials.
- Click Create credentials → OAuth client ID.
- Select Web application as the application type.
- Under Authorized redirect URIs, add:
https://your-domain.com/_system/auth/google/callback - Click Create.
- Copy the Client ID and Client Secret.
Set up GitHub OAuth
- Open GitHub Developer Settings.
- Click New OAuth App.
- Fill in the form:
- Application name: your site name
- Homepage URL:
https://your-domain.com - Authorization callback URL:
https://your-domain.com/_system/auth/github/callback
- Click Register application.
- Copy the Client ID.
- Click Generate a new client secret and copy the Client Secret.
Enter keys in the admin panel
- Sign in to the trip2g admin panel.
- Go to Admin panel → Google OAuth or GitHub OAuth.
- Enter the Client ID and Client Secret.
- Save and activate the provider.
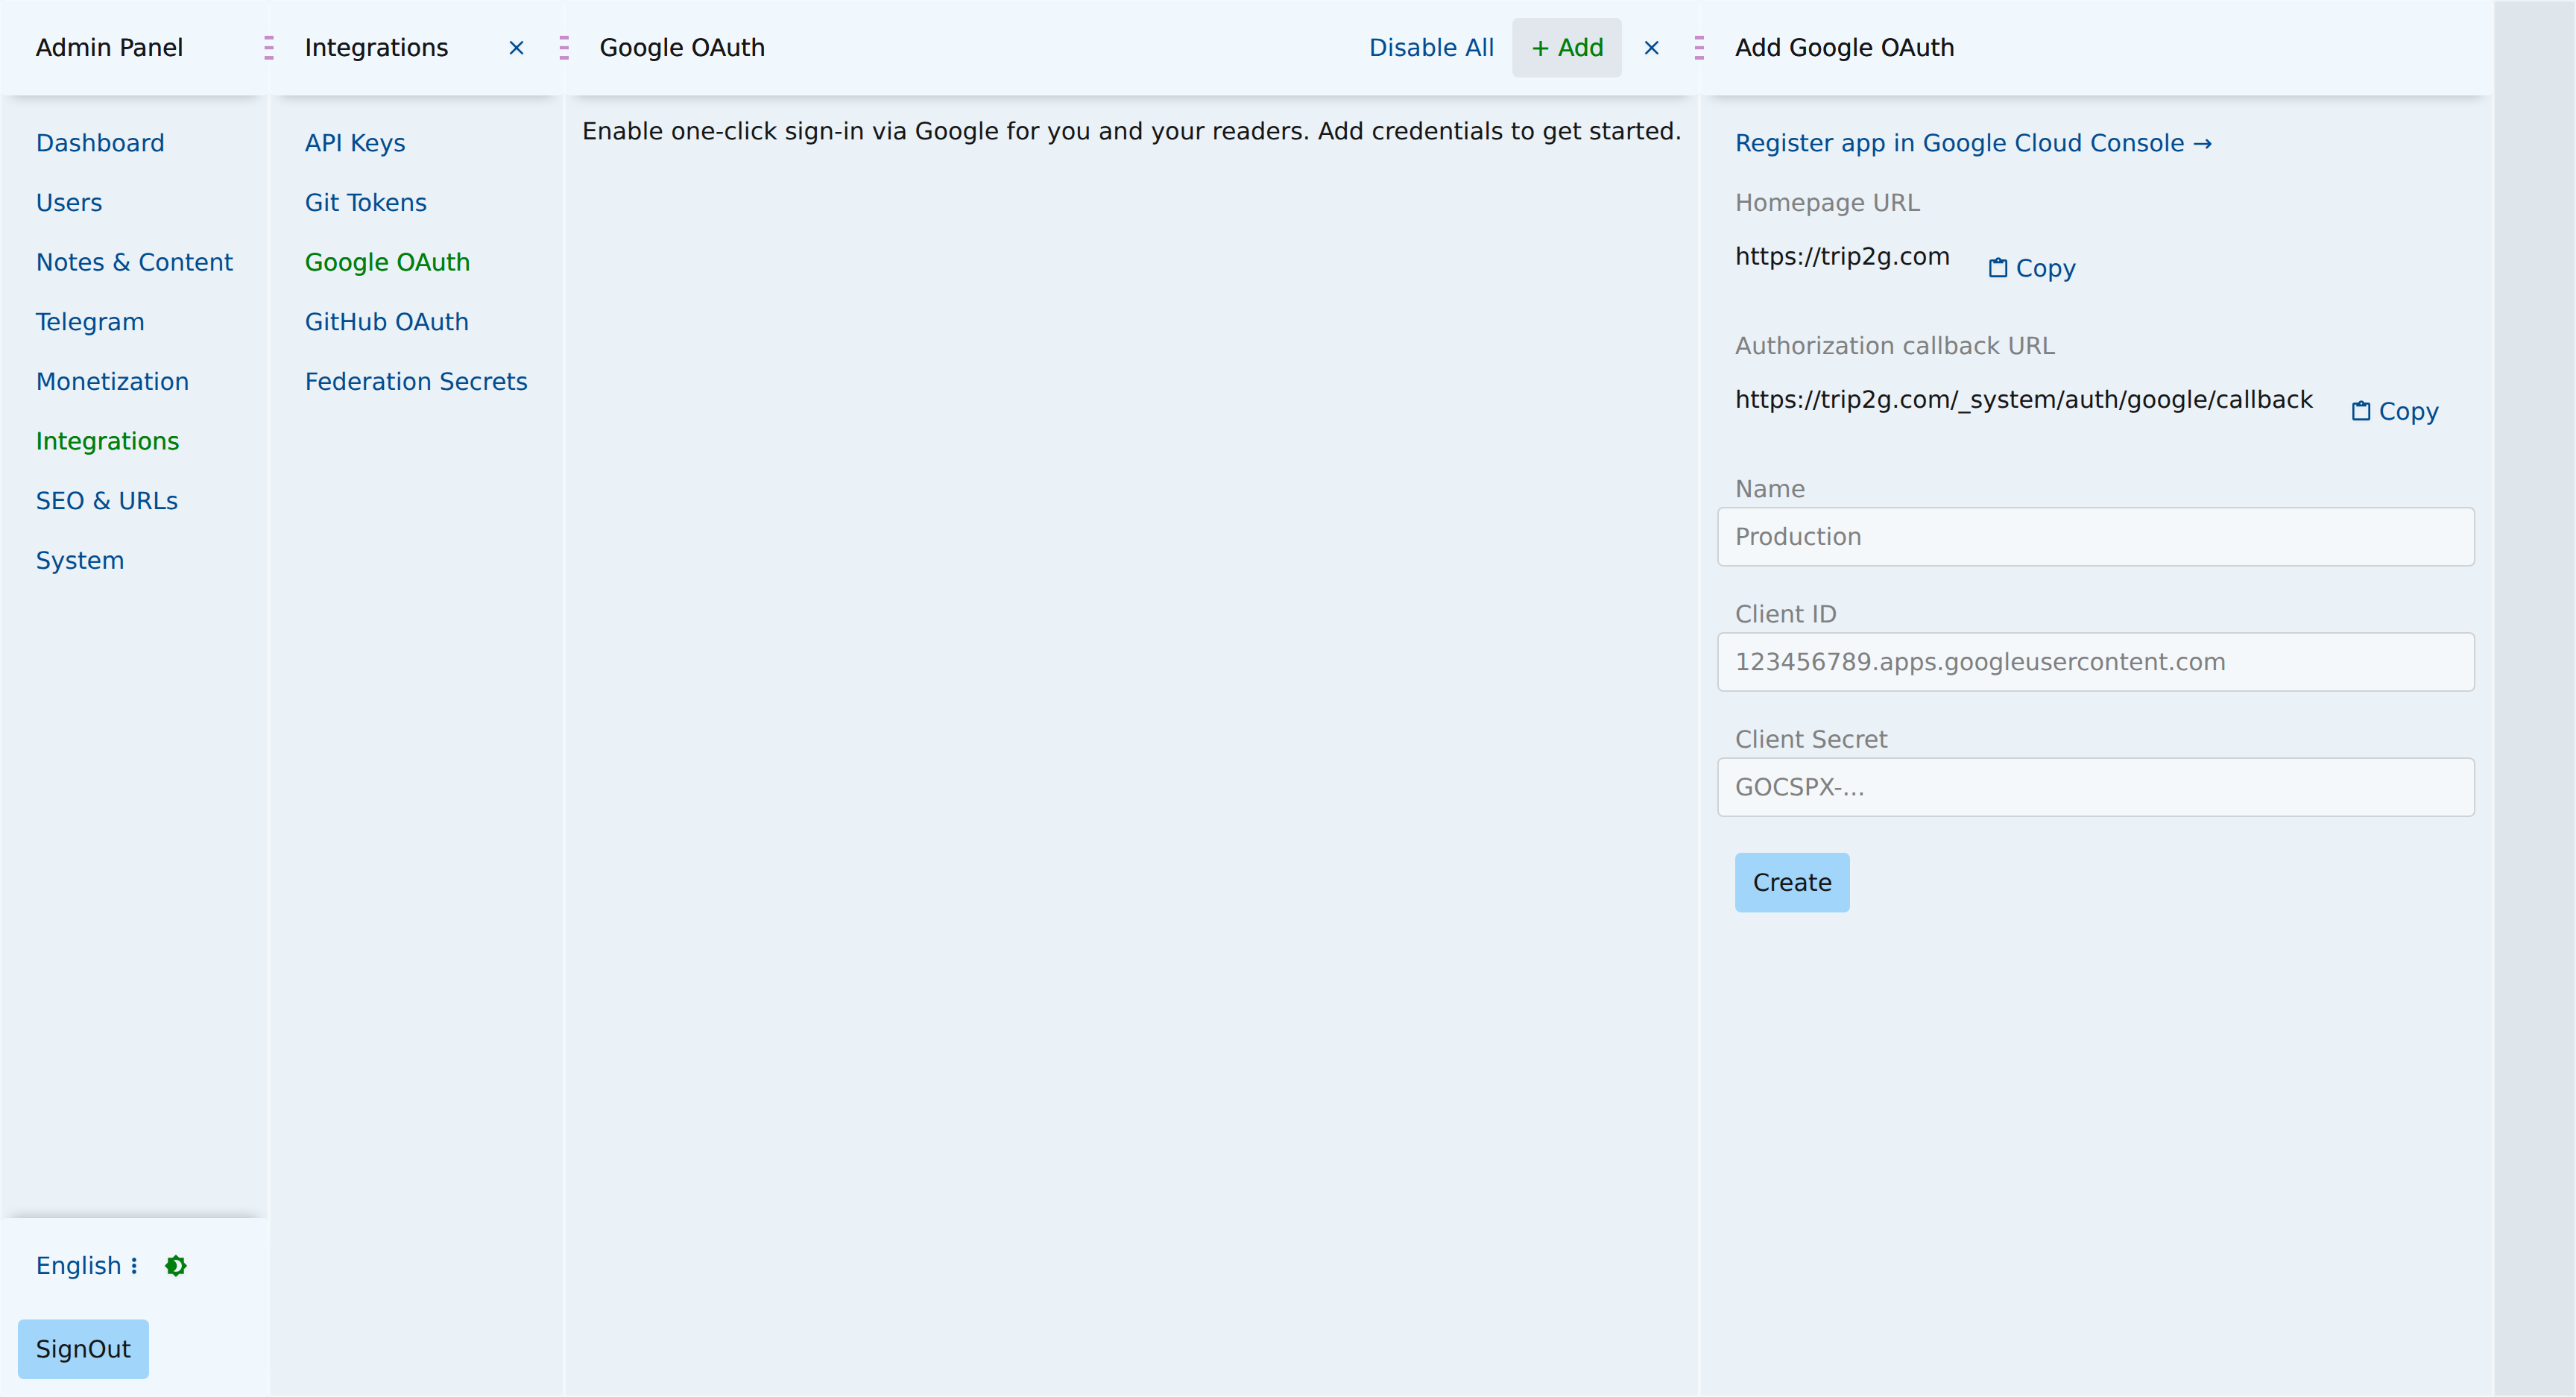
Once activated, the sign-in screen shows a Sign in with Google or Sign in with GitHub button next to the email field. Deactivating the provider removes the button; users fall back to email magic links.
Security
The Client Secret is stored encrypted in the database. Even if a database backup is exposed, the secrets remain unreadable without the encryption key.
Related
- en/user/oidc — OIDC / Corporate SSO (Authentik and other OpenID Connect providers)
- en/user/monetization — control which notes are public vs subscriber-only
- en/user/user_management — add readers and assign roles
- en/user/advanced — custom domains, SEO, and other hosting settings